sleepychat guide
How to set up cross-platform text-to-speech for Twitch, TikTok, YouTube, and Kick
sleepychat’s built-in Text-To-Speech allows your viewers to have their messages read aloud across Twitch, TikTok, YouTube, and Kick. Since it's integrated into your chat window, you don't need external software or overlays to hear your TTS messages -- it just works.
It's the perfect solution for multi-stream text-to-speech, allowing you to control TTS settings for all platforms in one place. Stop struggling with multiple one-off TTS integrations that constantly talk over each other, and don't work the same way across all platforms. Keep the flexibility to control TTS settings for each platform individually when you need to.
Before you start: get your chat window running
If you haven’t set up your combined chat window yet, start with the basic setup guide first. It covers linking platforms, creating your first Chat Feed, and getting the overlay into OBS.
Step 1: Open the Text-To-Speech section
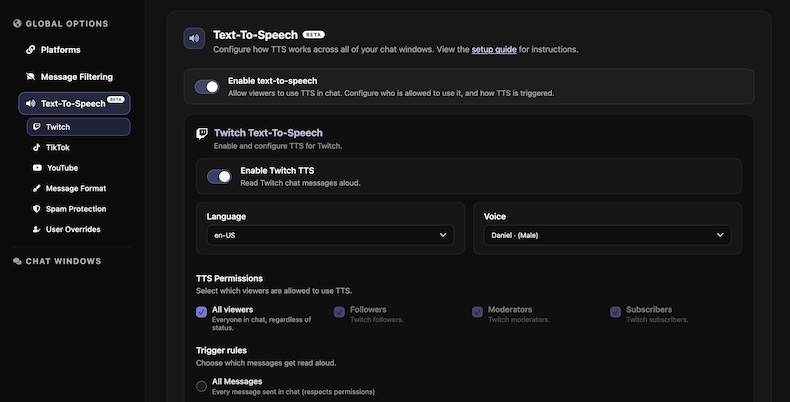
From your SleepyChat Dashboard, go to theText-To-Speech section. Toggle Enable text-to-speech to turn TTS on for your account.
Step 2: Enable TTS per platform
Each platform gets its own section. Use Enable Twitch TTS, Enable TikTok TTS, and Enable YouTube TTS to control where TTS is active. If a platform isn’t linked yet, you’ll see a note that says link your account above.
Step 3: Choose Language and Voice
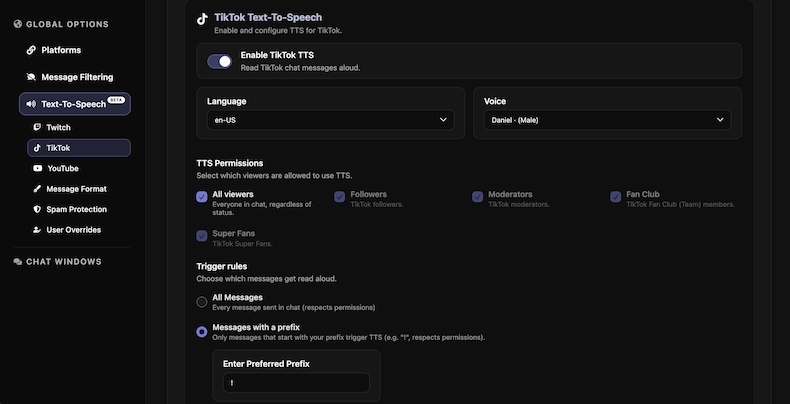
Inside each platform section, select a Language and Voice. When you change the voice, sleepychat automatically plays a short preview so you can sample different voices and languages before you stream.

Step 4: Configure Permissions & Trigger Rules
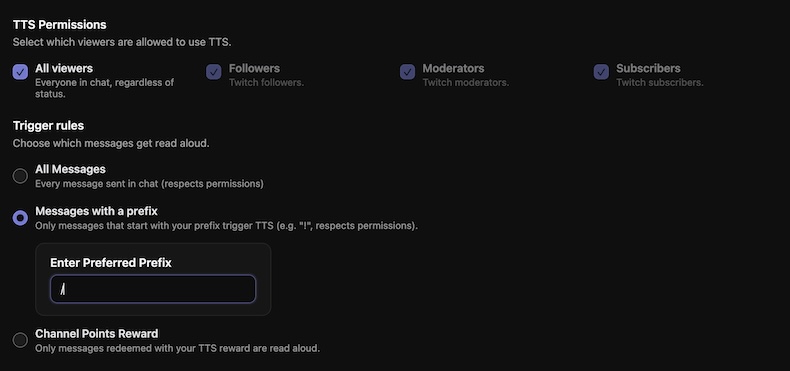
In TTS Permissions, choose who can trigger TTS per platform. The first option is All Viewers. If you want to restrict TTS, uncheck it and choose roles like Followers, Moderators, Subscribers, Super Fans, or Channel Members depending on the platform.
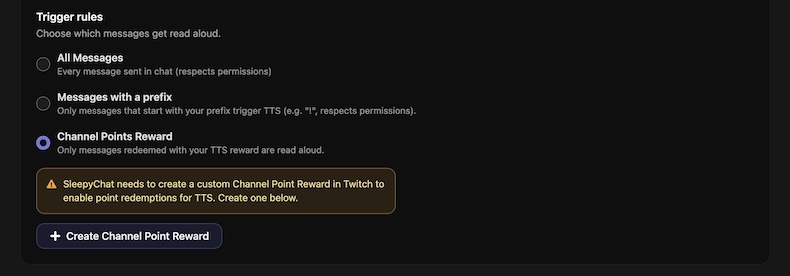
Under Trigger Rules, pick how messages get read aloud. Choose All Messages to read everything, or select Messages with a prefix and set your prefix (the default is !). Example: !this gets read.
Step 5: Optional message formatting and spam protection
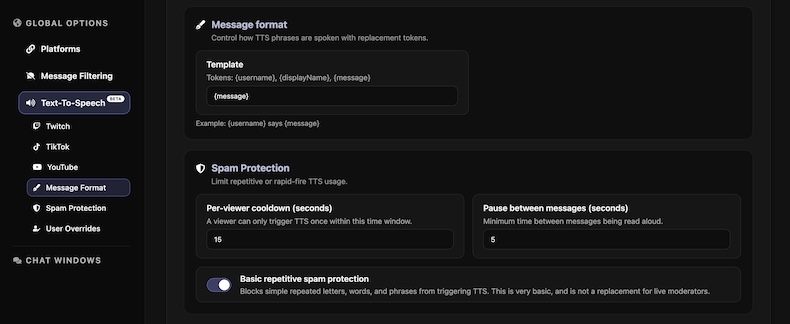
Use Message Format to customize how TTS speaks your messages. Supported tokens are {username}, {displayName}, and {message}. Example: {displayName} says {message}.
In Spam Protection, set Per-viewer cooldown and Pause between messages, then keep Basic spam protection enabled to block repeated letters, words, and phrases commonly used to spam TTS. The cooldowns and pauses help to prevent you from constantly hearing your TTS non-stop, and keeps individual viewers from spamming TTS over and over without a break.
Step 6: Twitch & Kick Channel Point rewards (optional)
Twitch & Kick let you trigger TTS using Channel Point rewards. In the Twitch/Kick TTS sections, select the Channel Points trigger and click Create Channel Point Reward to integrate SleepyChat with Twitch Channel Points rewards.
sleepychat will create a reward in your Twitch/Kick dashboard using the name and cost you provide. After it’s created, you can manage it in Twitch or Kick and adjust the point cost, name, or icon at any time.
Note: Channel Points are only available to Affiliates and Partners on Twitch, so if you are not one of these, you will not be able to set up SleepyChat with Channel Points Rewards on Twitch.
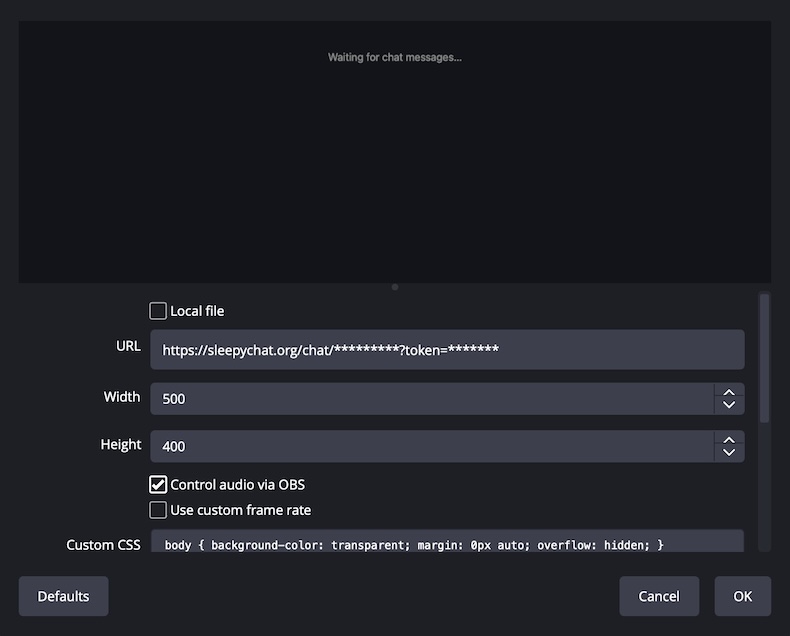
Step 7: Enable OBS audio control for TTS
To control TTS volume inside OBS, open the properties for your sleepychat Browser Source (or overlay), and enable Control audio via OBS. This exposes the source in the OBS audio mixer so you can adjust the volume and apply filters just like any other audio source.
If you want the TTS audio to be heard on stream, confirm the source is not muted and set its monitoring behavior in Advanced Audio Properties as needed.
Important: if you keep a separate sleepychat window open in a Browser Dock/Browser window (streamer view) and you use an OBS Source (overlay) to display chat to viewers, enabling Monitor and Output on the Browser Source will cause you as the streamer to hear TTS twice. In that case, set the Browser Source to Monitor Off so you only hear TTS from the docked window. Your viewers will still hear TTS from the overlay.
If you’re only using the overlay and do not have a second sleepychat window open to read from yourself, Monitor and Output can be enabled to allow you to hear TTS from the Browser Source (overlay) directly.
Next steps
Once TTS is enabled, open your chat windows and test a few messages. If you use both an overlay and a streamer dock, keep them open so TTS plays where you need it. You can always return to your Dashboard to fine-tune voices, permissions, and trigger rules.