sleepychat guide
How to build one multi-stream alert system for Twitch, TikTok, YouTube, and Kick
SleepyChat Overlays let you build one alert and layout system that works across all the platforms you stream to. Instead of rebuilding the same follow, subscription, support, or label setup for every service, you can reuse the same Widgets and animations across Twitch, TikTok, YouTube, and Kick.
They also go much deeper than a typical alert tool. SleepyChat gives you a canvas editor, timeline control, and full keyframe-style animation so you can build polished overlays and alerts in one place. This guide explains how Widgets and Overlays fit together and how to build your first working setup without getting lost in the editor.
What's the difference?
Widget
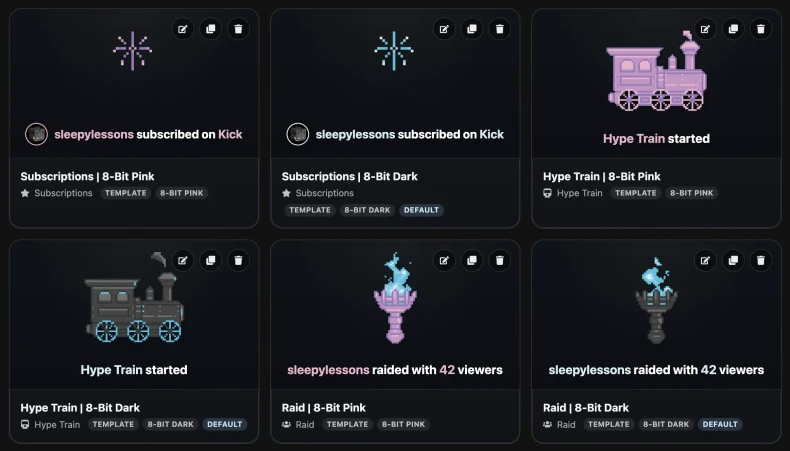
A Widget is a designed element that appears on screen. They can be static or event/alert driven. Static Widgets are used for always-on-screen content. Event widgets are short-lived alerts that react to events like follows, subscriptions, gifts, bits, kicks, raids, hype trains, etc.
Overlay
An Overlay is like a container for Widgets. You position your Widgets within the Overlay, so you can position them relative to each other. The overlay orchestrates behavior between widgets so that their sounds and animations don't play over each other at the same time. You will copy the Overlay link into your OBS browser source to display your widges, and you can also send test events to preview before going live.
The easiest way to think about it is: build your alerts as Widgets, then place them on the screen in an Overlay.
Recommended workflow
- Create a Widget
- Design how it looks
- Add animations, sounds, or custom Text-To-Speech messages to be read aloud
- Add it to an Overlay
- Copy the Overlay link into OBS
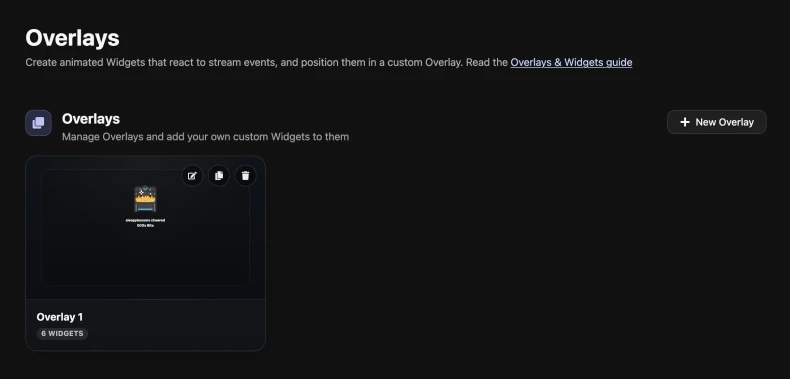
Step 1: Open the Overlays area in the Dashboard
Start in the Overlays section of your Dashboard. This is where you can create new Widgets, create new Overlays, and jump back into editors later when you want to update them.
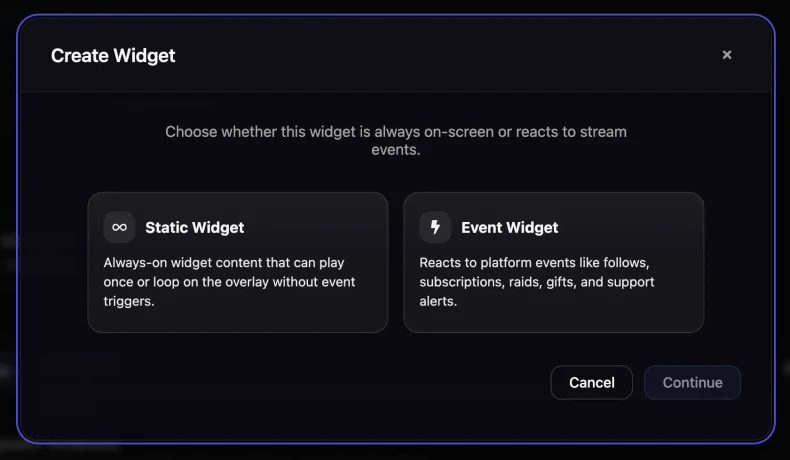
Step 2: Create your first Widget
Pick the kind of Widget you want to build first. A simple alert is the best starting point because it helps you learn the editor quickly. Choose the event type you care about, then decide whether you want to start from a blank Widget or from a template if one is available.
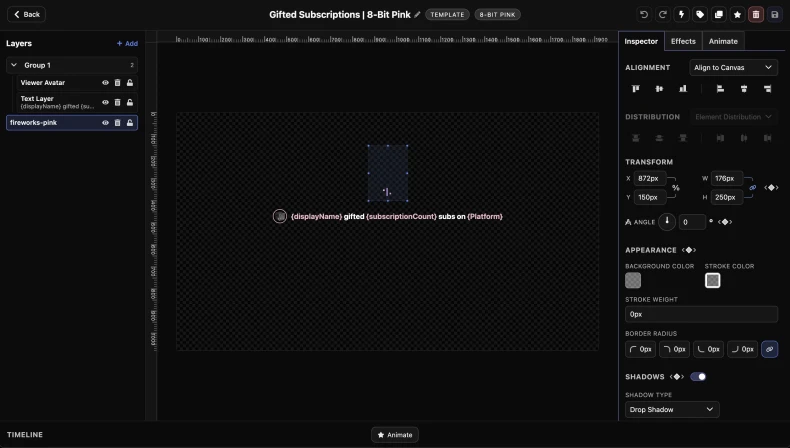
Step 3: Build the visual parts of the Widget
Inside the Widget editor, add the pieces you want to show on screen. Most Widgets are made from text, images, shapes, and sometimes sounds. For an alert, start simple: a background shape, a text layer, and maybe an image or icon.
Use the canvas to move things around and size them. If layers overlap, use the Layers panel to grab the exact item you want.
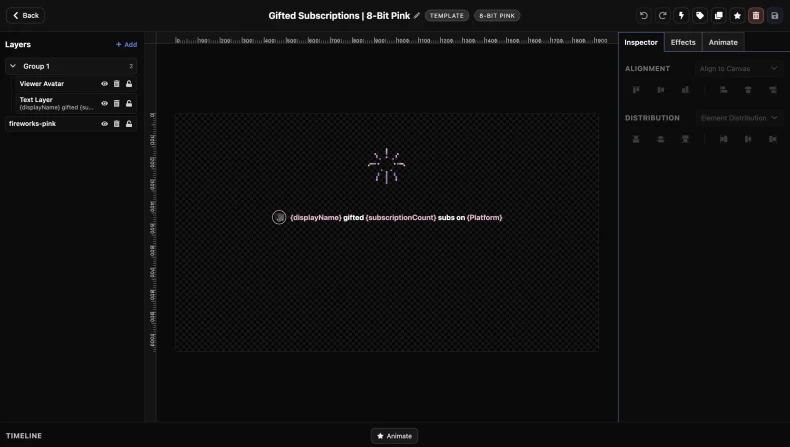
Step 4: Style it in the Inspector and Effects panels
Once the right item is selected, the Inspector is where you change how it looks. This is where you edit size, color, alignment, spacing, and other visual settings.
The Effects tab is where you work with Filters and Distortion. Use it when you want to blur something, shift how it looks, or push it into a more stylized direction. If you just want to change normal appearance settings like size, color, opacity, or shadow, stay in the Inspector.
Want it to move?
SleepyChat supports both quick animation presets and more detailed timeline animation. If you just want a fast fade, slide, or pop-in, the Animate tab handles that. If you want exact control over timing and motion, use the timeline.
This guide keeps animation light so you can get a working setup fast. For a deeper walkthrough, use the full animation guide.
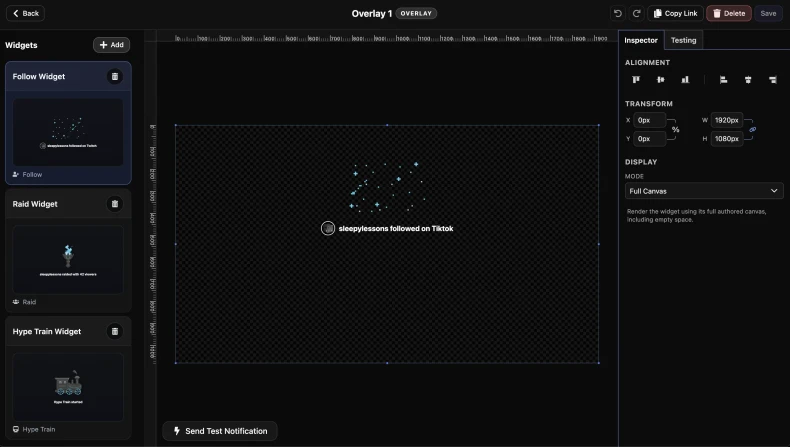
Step 5: Save the Widget and add it to an Overlay
After your Widget looks right, save it. Then open or create an Overlay and add that Widget to it. This is where you decide where it should appear on the stream layout.
If your Overlay has more than one Widget, think about where each one should live on screen so your alerts, labels, and other pieces do not fight for the same space.
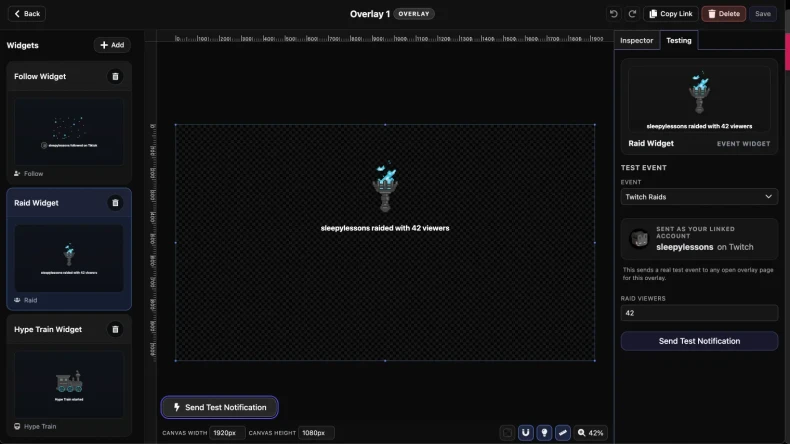
Step 6: Test the Widget before going live
Use the test controls to fire a sample event and make sure everything looks right. This is the fastest way to check your layout, text, timing, and sounds before a real alert happens on stream.
If something feels off, go back to the Widget editor, make the change, save, and test again. Expect to do a few quick passes while you dial it in.
Step 7: Add the Overlay to OBS
Copy the Overlay link and add it to OBS as a Browser Source. This is the link that shows the finished result to your viewers. Once it is added, resize and position the Browser Source inside your scene like any other stream element.

Know your way around the editor
Canvas
The main working area where you move, resize, and line up visual pieces.
Layers
Useful when items overlap or when it is easier to select something from a list than by clicking it.
Inspector
Where you adjust the selected item's size, color, alignment, text settings, and other core options.
Effects
Where you add extra visual styling like distortion or color filters.
Animate
Where you add quick animation presets or jump into more detailed timing control.
Timeline
Where you handle timing, sounds, and keyframe-based animation. If you are familiar with video & animation software, this panel should feel similar to other tools you have used.
Next steps
Once your first Widget is working, duplicate it to make variations for different event types, platforms, or screen positions. That is much faster than rebuilding each alert from scratch.